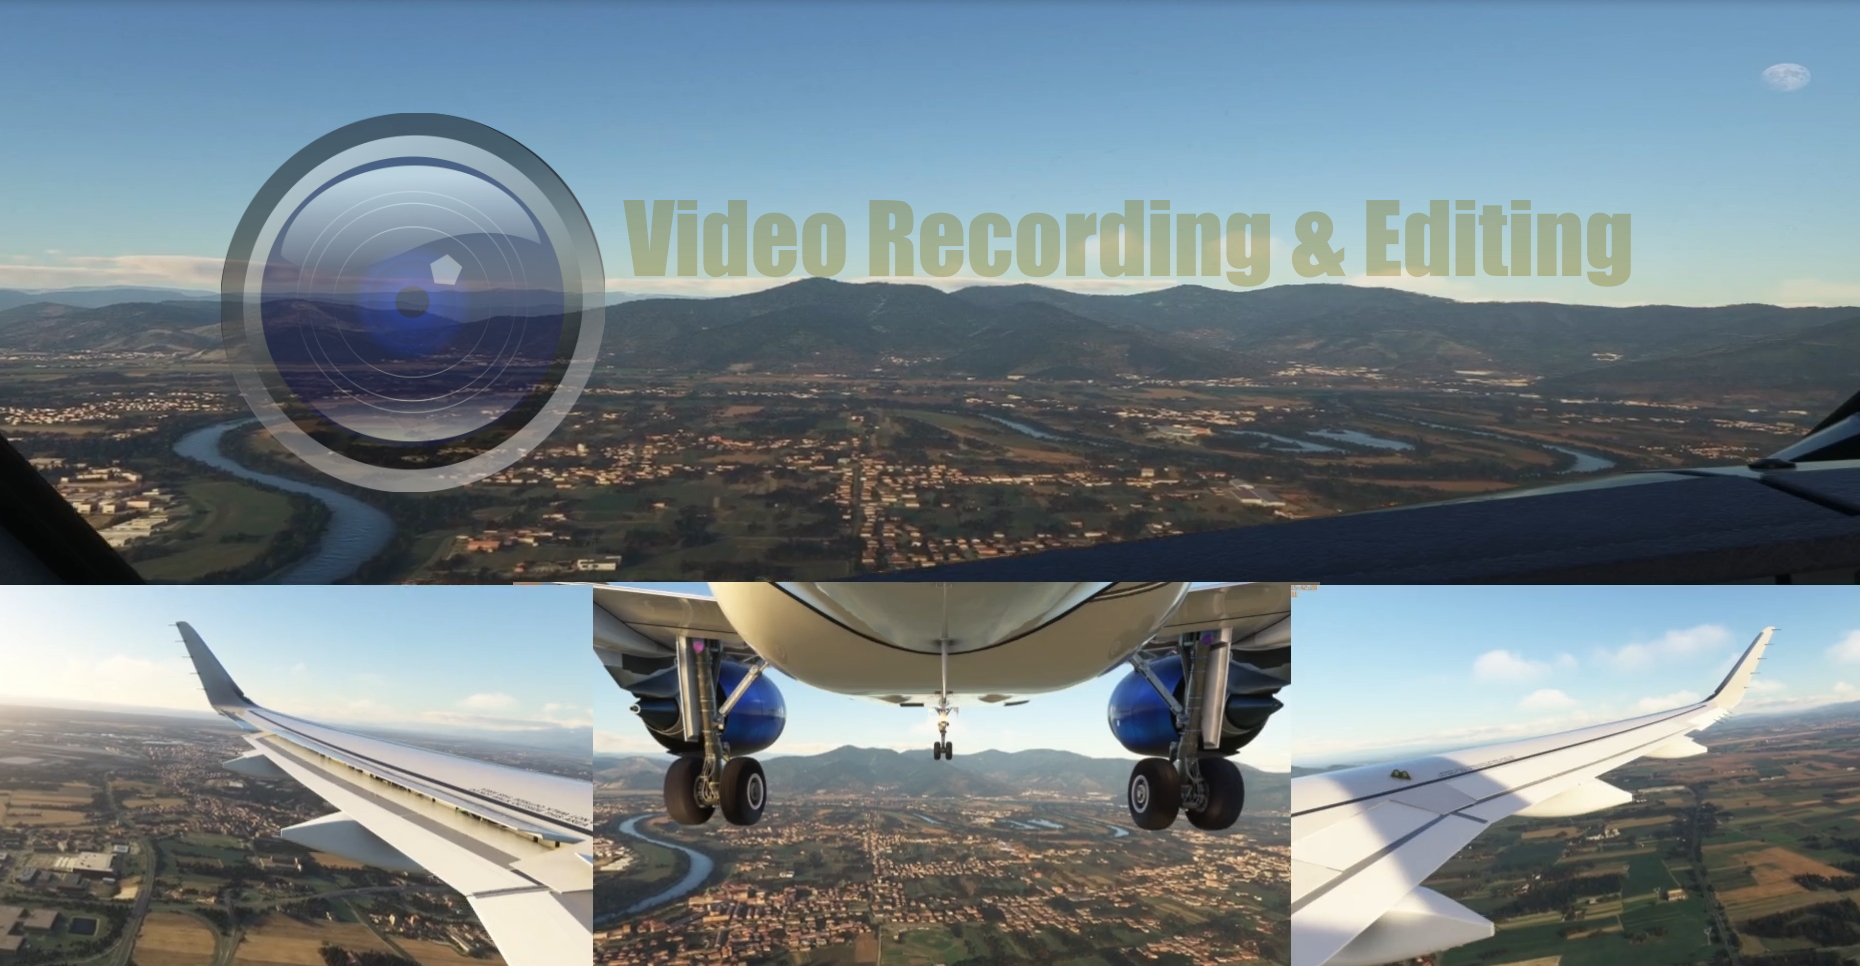
Video Recording & Editing
Do you often wonder what software and method to use when creating videos, either to stream live or recorded and post edited before uploading. The following article covers the basics on how to get started with OBS Studio and some basic editing techniques using Shotcut, both Open-source freeware programs.
I shall try and cover things in a structured manner in separate sections:
- Software
- Set-up
- Recording
- Editing
Software
There are many pc video recording tools available online, some payware and some freeware. For this article I shall be showing the freeware software that I personally use. However a quick search on Google and a bit of research and you should find something that suits your requirements. The basics of capturing your flight, once the software is set up, are basically the same. For NVIDIA graphics card users that only have a single screen, then I would recommend Shadowplay. which comes with NVIDIA GForce Experience. Unfortunately if using multiple screens with Windows, Shadowplay will record the whole multiple screen desktop.
My choice of recording software, and one of the most popular freeware products is the Open-source OBS Studio. Whilst it's user interface may at first appear appear somewhat daunting, I'll try and show and explain how to quickly set it up. There are also many good tutorial videos on YouTube.
With the emergence of MSFS 2020 on the scene, I also use the freeware Flight Recorder, available from Flightsim.to. This is useful to capture different views and angles, as well as allowing you to create split screen videos as in the example in the header of this article. I shall attempt to explain how to achieve this in the section on Editing. MSFS recently intorduced their own Recorder / Replay tool as a Beta, but I just find Flight Recorder much simpler to use.
For editing I have found the Open-source freeware ShotCut
Set-up
This section will cover the basics of setting up OBS Studio. After downloading and installing the software the opening screen of OBS will look something like this:
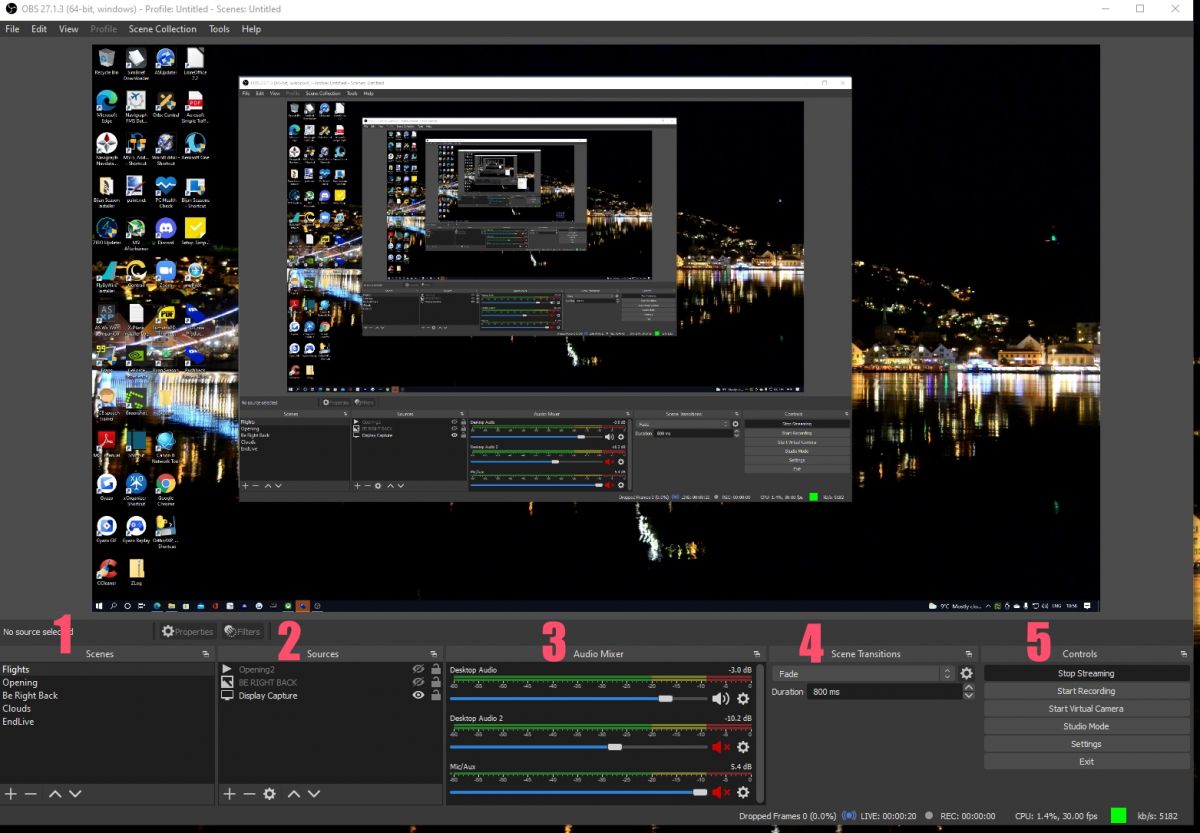
- Scenes - First create a "Scene" by hitting the [+] at the bottom of the Scenes window. Call it what you like. As you see mine is called Flights. Once familiar with OBS, you might want to add different scenes which can be used to enhance your video. You can see that I have Opening and Ending scenes which contain videos.
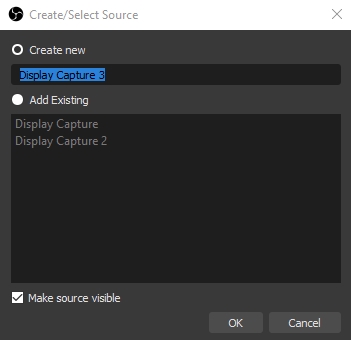
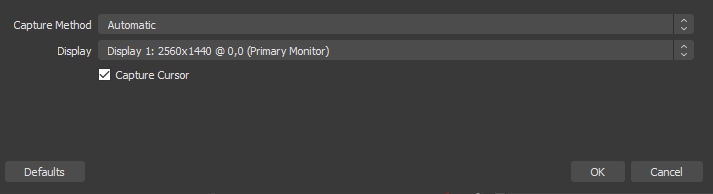
- Sources - With the Scene highlighted, click on the [+] at the bottom of the Sources section. A drop down list will apear with the types of source you wish to capture. For your main flight screen just select Display Capture. You then give it a name, followed by the capture method (leave on Automatic) and the screen to be used if you have more than one. Additional Sources can also be used to overlay over the main capture screen. For example by defining a source as a Video Capture Device (Webcam) to overlay your image while streaming or for that matter recording.
- Audio Mixer - This allows you to adjust volumes and mute the various audio sources that you may have e.g. Main desktop audio / headphones (shown as Desktop Audio 2) and microphone.
- Scene Transitions - If you have defined more than one Scene (in 1. above) this allows you to define how they transition from one to the other.
- Controls - Fairly self explanetry; [Start/Stop Streaming], [Start/Stop Recording] (will record the video file to your pc), and [Settings] are the only ones that I use. Not sure what the others do, but I don't seem to need them. There are tutorials online.
Settings
Having created your 'Source', highlight it, then click [Settings] under the Controls.
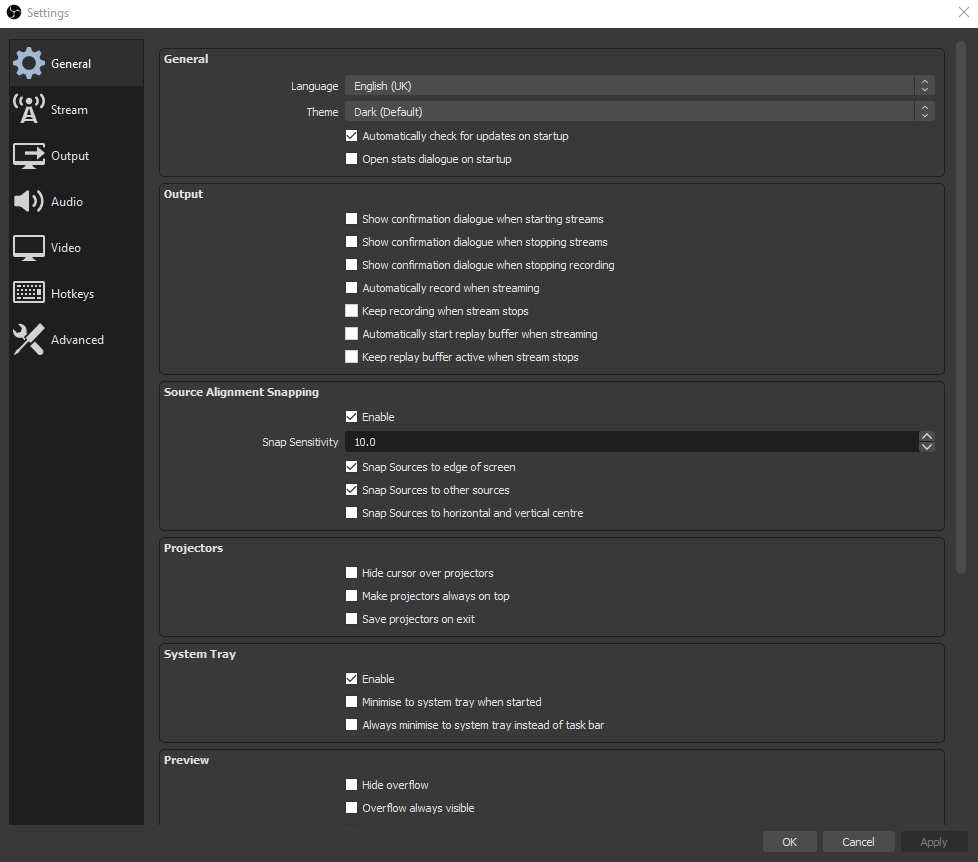
- General - For the most part you can leave the General settings on default, but feel free to explore them.
- Stream - If you intend doing live streaming online then here you can setup the service that you wish to stream to such as YouTube, Twitch, Facebook Live etc. etc.
- Output - Set up the path where you want recorded videos to be saved on your pc, recording quality and format, and encode hardware. Would suggest leaving the latter on default, which for NVidia graphics card users is "Hardware (INVEC)"
- Audio - As it suggests, displays your various audio sources that you wish to record. These will be displayed in the Mixer section of the main screen. You can adjust volume levels and mute the different audio sources.
- Video - Here set the Base resolution of your screen and the scaled Output resolution. For example: if your screen is 1920x1080 but for performance reasons you want to record your video in a lower resolution you could downscale the output to 1280x720.
- Hotkeys - You can set hotkeys for many of the basic functions like Start/Stop/Pause/Resume Streaming or Recording etc. This is particularly useful if you are only using a single screen and wish to minimise OBS. However ensure that OBS is set to run as Administrator.
- Advanced - Unless you understand a lot of video related terminology, I would simply leave this as defaulted.
Recording
Streaming a video or simply recording a video is relatively straight forward. Assuming that you have an account to allow you to stream live to your service provider e.g. YouTube, and have set it up to enable you to stream videos, then one would typically start streaming. I'm not going to go in to how to set up your provider to allow you to stream as it is often service provider dependant, but you can find several tutorials by searching on Google or YouTube.
In terms of the basic recording of videos to your PC one would normally simply hit the [Start Recording] button on whatever recording software you are using, or the Hotkey that you have assigned to do so. If however you wish to produce a 'split screen' video, you would need to utilise some form of Replay tool, to re-record your video from a different view point. In my case, when using MSFS 2020, I open Flight Recorder in addition to OBS, and when hitting [Start Recording] on OBS I immediately start recording Flight Recorder too. By doing so, after completing my main recording, I can replay Flight Recorder as many times as I wish and record additional videos from the same point as the original recording*. Below you will see how these can be used when editing the final video. If flying with X-Plane11, then it has it's own Replay function built in whereby you can roll back and start recording again from the different view that you want.
* Unfortunately when replaying Flight Recorder on a flight with a 3rd party aircraft in MSFS 2020 such as the FBWA320NX or the CRJ7, not all the movements are replicated such as flaps and spoilers etc, so you will need to be aware of this and if necessary manually set them during the replay. Landing gear appears to work OK. Also note you should have engines running when playing the Replay.
Editing
Ok, now for the fun bit. You have recorded your video or videos and wish to edit it, either to cut out bits that were too long, or to merge different camera angles that you made during an 'original' single recording. As stated in the intoduction on software, I have found that the freeware Open-source program ShotCut offers enough functions for my needs. Once downloaded and installed, execute the Shotcut / application and the screen will look similar to the following:
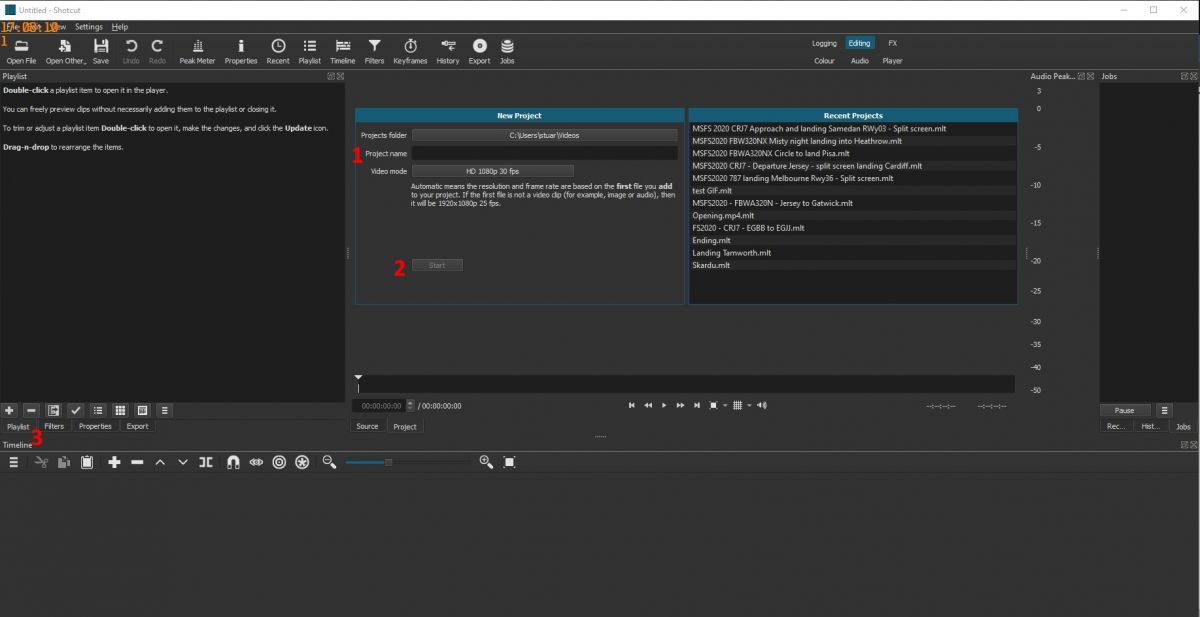
- Project Folder & Name - You can change the path where your video will be created by clicking on the [Projects Folder] button. Then give your video a project name in the box below.
- Start - Hiit the [Start] button to begin your video creation.
- Playlist - Then click the [Playlist] button. The screen will then change with the Playlist area on the lefthand side.
In Windows Explorer, select your saved recorded video/s and drag into the ShotCut 'Playlist' area. You will then see the video/s appear within the playlist area (1. in the diagram below).
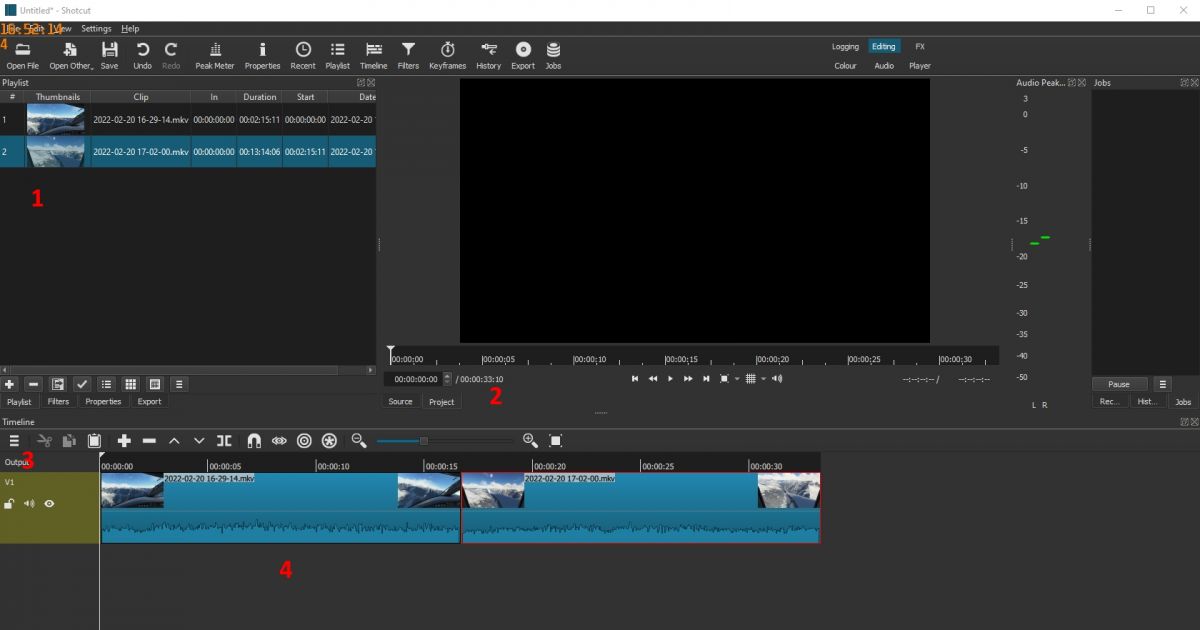
- Videos to be edited are shown in the Playlist area, and by double clicking and highlighting a video it will appear in the centre screen. This is the review screen (2).
- Underneath are 2 Tabs; Source and Project. If Source is selected the screen will reflect the source video in the playlist, whereas if Project is selected it will reflect your edited video as in the Timeline below.
- Click on the three horizontal bars and select [Track Operations][Add Video Track] and a track will become available within the Timeline area.
- Drag the video/s from the Playlist into the Timeline video track that you just created or with the video active in the review screen hit the [V] icon just above the Timeline window. When doing the latter, the video will appear at the point where the timeline arrow is set.
To add a simple 'fade' transition between video clips:
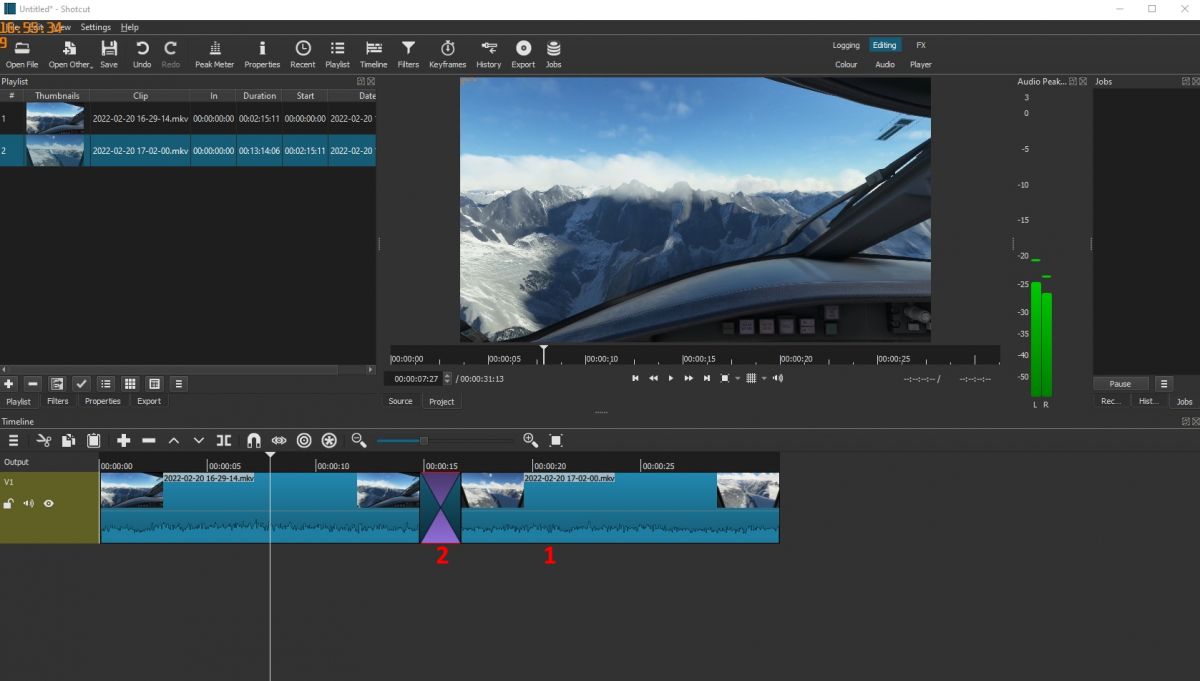
- Click on the video clip that you wish to transition to from the previous clip, and drag to the left across the previous script for the the number of seconds you require the transition to cover. This results in the shaded box (2) you can see above.
- Shotcut provides other transitions than a simple fade in. By right clicking on the shaded area and selecting [Properties] a number of alternative transition types will appear where the Playlist was. To return to the Playlist after confirming your choice, click the [Playlist] tab just above the Timeline.
If you wish to add the second clip above as a 'split screen' window (as is depicted in the picture in the header of the article), then instead of creating the transition above, you do so by adding an extra video track by right clicking on the three bars as before and subsequently applying a Filter. This is depicted and explained in the picture below:
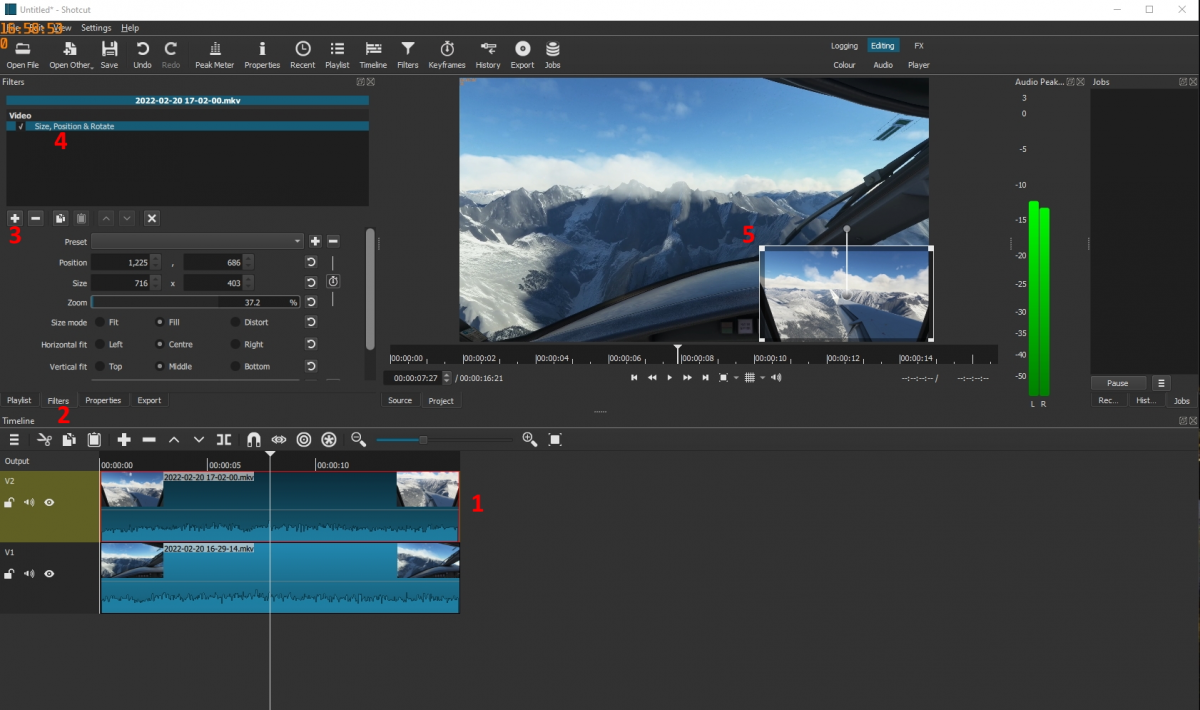
- Click on the second video clip and drag it to the position wheere you need it in the new track.
- Click on the [Filter] tab just above the Timeline.
- Click the [+] sign and
- Select [Size,Position,Rotate] from the drop down of filters.
- You can then drag / resize the clip using the corners, and position it by clicking anywhere within the clip and dragging it to where you want.
Another editing function that I use alot is to remove a section of a video that I don't want. To do this follow the steps below:
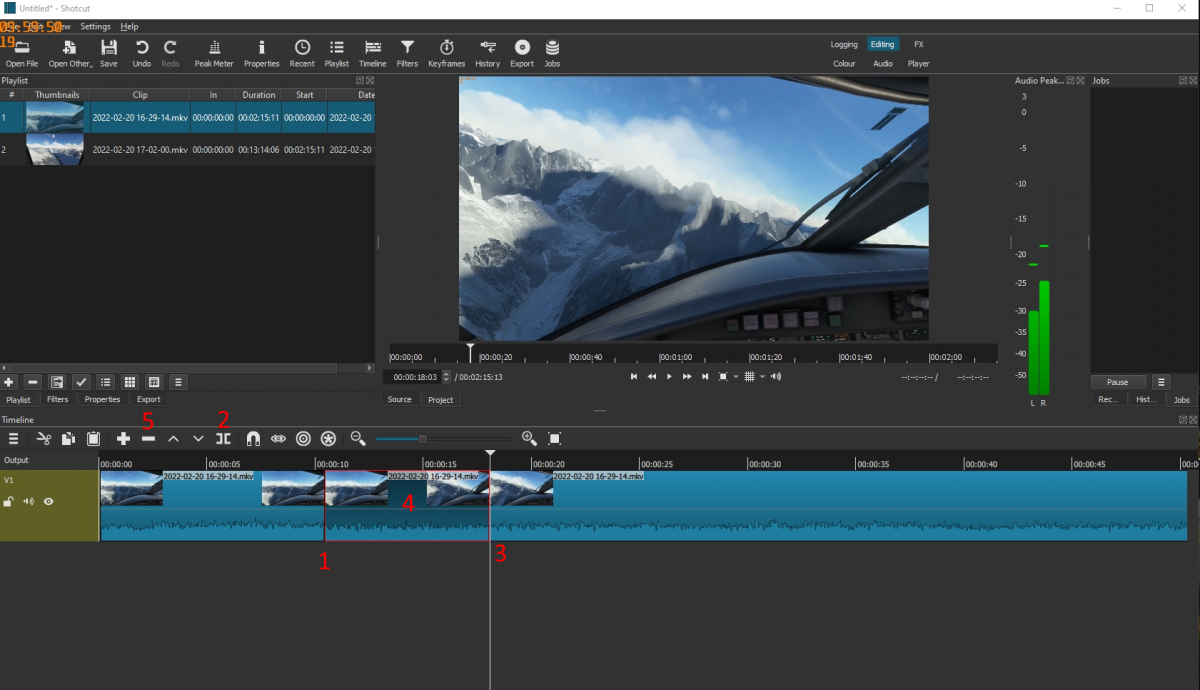
- First click on the timeline to move to the point where you want to mark the beginning of the section to be removed.
- Click the ][ symbol just above the timeline window. This will split the video at this point.
- Move by dragging the pointer, or clicking on the timeline to the point at which you want to mark the end of the section to be removed.
Then repeat step 2 above to split the video again. - Click within the section to be removed, then
- Click the [-]symbol just above the timeline window. This will remove the section and shift the remainder of the video left to the point at 1.
Note: If you do something wrong simply click the [UNDO] icon below the top menu bar, as many times as needed to get back to a particular editing point.
To Close
The above are really the only functions within Shotcut that I tend to use, although I'm often finding different ways of doing things. The various 'Filters' are very useful, particularly GAIN/VOLUME, which allows you to adjust the volume of a video, or section, or to adjust the volume of added audio tracks if they are too loud / not loud enough. Also the FADE IN & FADE OUT VIDEO or AUDIO, BRIGHTNESS or CONTRAST can be useful too.
Shotcut has many other facilities which I just haven't got around too or, as yet, found a need to use.
There are many video turtorials on YouTube on how to use both OBS and Shotcut and would recommend checking out a few covering the basics. Here are a couple of videos that are aimed at getting started and cover the things that I have covered above in more detail.
Comments
This is a community-moderated forum.
All post are the individual views of the respective commenter and are not the expressed views of Fly UK Virtual Airways.
By posting your comments you agree to accept our Terms & Conditions.

Categories
Featured Posts
Fly UK Attends FlightSimWeekend 2026

Fly UK 2024 Survey results
F1 2026 Tour Launches February 1st
A Year of Tuesday Night Flying on VATSIM
Fly UK Takes on the World: WorldFlight 2024
Latest Posts

WorldFlight 2026 - Be part of the crew
Fly UK Attends FlightSimWeekend 2026

Fly UK is recruiting and staff updates
Fly UK 2024 Survey results